
About 3DCG
About 3DCG
There are two ways to create 3D data, one is to scan the real thing and the other is to create the real thing with 3DCG. Last time, I introduced an article about scanning, but this time I would like to introduce an article about computer graphics.
First of all
Knowledge and technology of 3DCG that the content becomes hard when you start the explanation.
It's already hardened from this sentence, but it's this hardness that raises the bar for 3DCG, and it doesn't mean that many people are reluctant to start using it. Is not it. At this opportunity, I would like to somehow dispel the hardness and invite many people into the fun world of 3DCG.
As one of the ways to take the firmness, I would like to explain without using technical terms as much as possible, so it may be unsatisfactory for those who want to acquire knowledge, but please look at it as a reconfirmation of the way of thinking. It might be just right. However, since I have to explain it, I will sprinkle the minimum necessary knowledge, so it would be nice if you could put them in the corner of your memory, even if they are little by little.
In addition, it is a measure to help with explanation images with loose characters, so please do not think that it is crap.
3DCG by the side of life
For those who are new to 3DCG, I think it will be difficult and scary.
However, the world is not as difficult as you might imagine, and in fact, the chances of experiencing the world of 3DCG through games have increased significantly compared to a decade ago. Therefore, there are many people who have acquired a sense of 3D space without knowing it. So I'm sure I'm not scared, so why don't you touch it together?
XYZ
First of all, I will briefly explain the word XYZ, which is used to grasp the space.
Let's enter from the figure. The character is pointing and shooting arrows in each direction. These arrows are X, Y, and Z, respectively, pointing to space.

Humans can communicate with "there" or "this" if it is in front of them, but for PC software called 3ds Max, such vague words cannot understand the place.
Therefore, X and Y are treated with images such as directions and coordinates (latitude, longitude). This way, both humans and 3ds Max can understand each other as numbers. If you add the height Z to it, you can express the coordinates XYZ, which points to a three-dimensional space, numerically.

With only X, you can go back and forth in a straight line
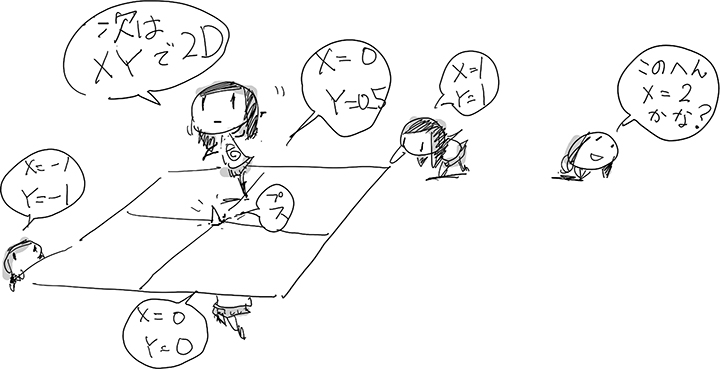
By adding Y, you will be able to see the location on the vertical and horizontal planes.
By having all of XYZ, you can use 3D coordinates so that you can understand the space.
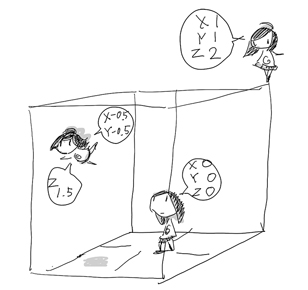
However, now that I can always work without being aware of this XYZ with numbers, it may be enough to put it in the corner of my head as knowledge first.
Next, let's stand at the entrance to make things while actually touching 3D software called 3ds Max.
3ds Max Interface Where is it likely?
It's not limited to 3ds Max, but when learning a lot of software, it's important to be able to predict what is likely to happen.
The authors and others are not very confident in their memory, but in reality they can only make a crisp memory. However, how to master the software is the above-mentioned prediction. We will practice it by relying only on the memory of where we can reach the desired function and what is likely to happen.
Please see the figure first.
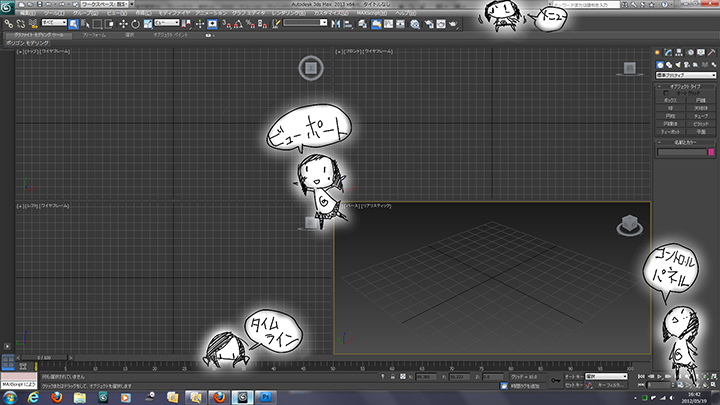
The 3ds Max interface is broadly divided into four parts.
·menu
Somehow, various things are packed with a list of letters and icons. It's packed, so it's a place to first remember only what you really need, and then predict and search from words! !!
·Viewport
This is the place to work. You can see the 3D model from various directions at the same time to check it on the 2D monitor. By default, it is in a 4-view view.
·Control panel
It's tabbed, and it's packed with many features as well as menus. It is categorized and tabbed in an easy-to-understand manner, such as creating, modifying, adding movement, and controlling the display.
·Timeline
Here is a scale that shows the time. On the right side, there are also icons for controlling video playback and so on. In fact, the right corner is also lined with control icons on the viewport that have nothing to do with time.
As mentioned above, it is also easy to remember to reduce the part to be memorized.
It is studying to just memorize before actually starting to make it, and I am honestly hard. It is better to memorize with the body while experiencing it, because it will be memorized in various relationships, so the memory itself will be stronger, so let's add information such as necessary functions while actually making things.
That said, let's have one more look at the additional information before actually making it.
A breakdown of the viewport.
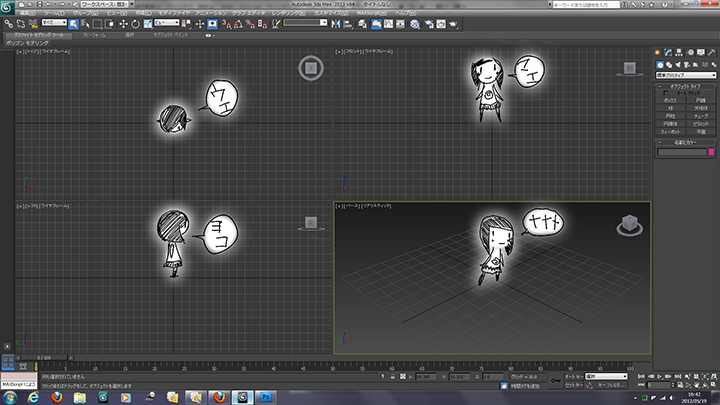
We will look at it from the upper right, but this is the front view, which is the screen where you are looking at things from the front.
Next, on the upper left, this is called the top view when viewed from above. Can you see the figure? The face is facing down. It means that the front is the bottom of the screen.
The lower left is the left view, the screen seen from the left when viewed from the front. Here, the face is facing to the right, which means that the front is on the right.
By the way, in the lower right, this is a perspective view, and it's seen from an angle ... That's a rough explanation. The screen is actually invisible with a camera. I will explain it again after creating an object later.
Now let's create a 3D object in this empty space.
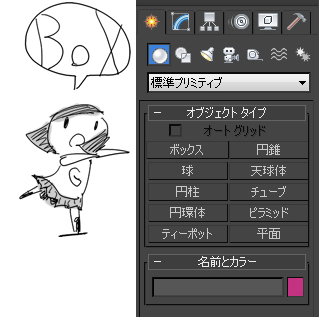
Look at the control panel. When you're just launching 3ds Max, there's an active tab called the "Create Panel" for making things.
As shown in the figure, there are buttons for starting to create some simple objects, so let's find a button called Box from here and press it.
When you press it, the color changes and it looks like a dent. Now that we're in the mode to keep making boxes, let's make a box in the viewport.
Please see the reference animation for how to make it. First of all, this image comes to mind.
Determine the bottom by spreading it on the floor, and extend it upward to determine the height. These two steps.
Specifically, let's try it from a perspective.
First, drag with the left mouse button on the viewport, and the bottom will expand according to the movement of the mouse, so release the left button once when it reaches the size.
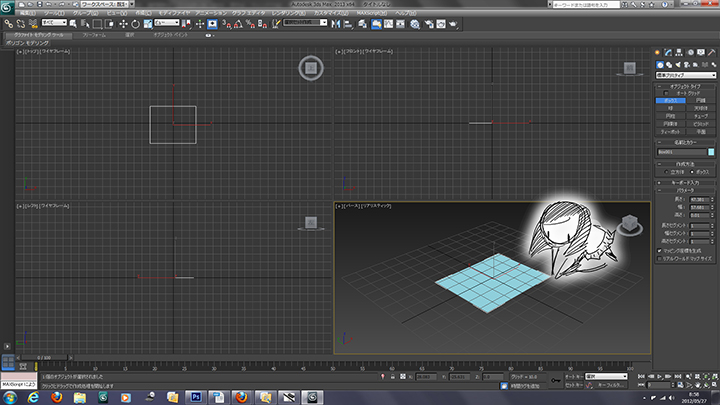
Next, move the mouse up and down without pressing the button. Please do not float it in the air even if you say up and down, does it mean back and forth movement in that sense?
By doing this, the box will grow from the bottom and the height will be linked to the movement of the mouse, so click the left button once at a reasonable height.
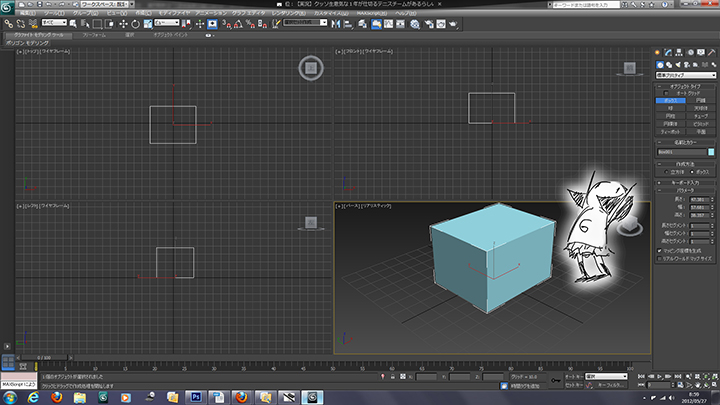
This will fix the height and complete one box.
Even after making one, it is still in the box making mode, so you can continue to make more continuously on the view. When you no longer need to create a box, right-click once in the viewport to exit the box creation mode.
Now, let's continue with the viewport that we had put on hold earlier.
Move the mouse to the perspective view at the bottom right, which is described as diagonal. Let's learn how to operate the view freely so that you can see where you need it.
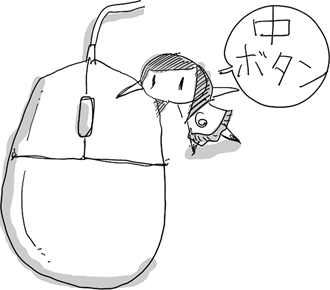
It is convenient to use the middle mouse button.
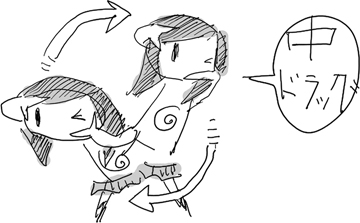
You can shift the screen in a plane by dragging the middle button. In the help etc., it is explained as bread. It is an image of changing the viewing place by moving the viewing window in parallel to the screen up, down, left and right.
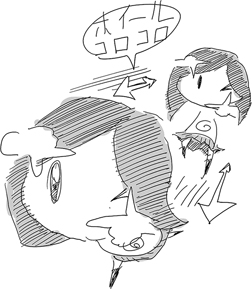
The scroll wheel, which often has the middle mouse button, supports zooming. The visible range on the screen becomes wider or narrower. In other words, you can change what you see to look smaller or bigger. I'm not making the object bigger or smaller. By the way, in the perspective, the peephole moves closer to or further away from it.
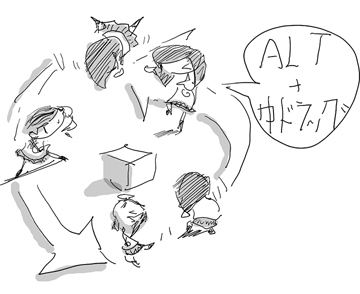
Finally, drag the middle button again. However, this time, hold down the ALT key on the keyboard and drag the middle button. The center position you are looking at may change depending on the settings, but the movement of the peephole is not parallel to the screen, but moves spherically around the point you are looking at. It's hard to imagine words. Please see the figure. Is it an image of looking around from the surroundings like this? This is the moment when you can feel what you have made in three dimensions. During modeling, such as creating an object, look around as much as possible to see if it is the desired solid. Let's turn it around persistently. Rather, it is better to be able to enjoy what you have made by turning it around.
However, when manipulating the view in this way, you often lose track of the object you are looking for.
In such a case, press the "Z" key alone. This will adjust the view so that if an object is selected, it will fit on the screen, otherwise everything in the scene will fit on the screen.
In addition, shortcuts such as "T" are assigned to match the top view, "F" is assigned to match the front view, and "L" is assigned to the left view, so use them as needed. Until you get used to it, it's a good idea to leave it at the top, front, and left except for the perspective view at the bottom right.


